Learning the basic types of knots is essential to fishing. The first – and sometimes might be the most critical – step is tying your fishing line to your reel. However, starters are often overwhelmed with learning knots and tying lines to reel on their own.
If you are a beginner, here are two easy knot options to help you choose the best method to attach a fishing line to your reel, as well as a step-by-step guide and additional tips to start out your fishing hobby.
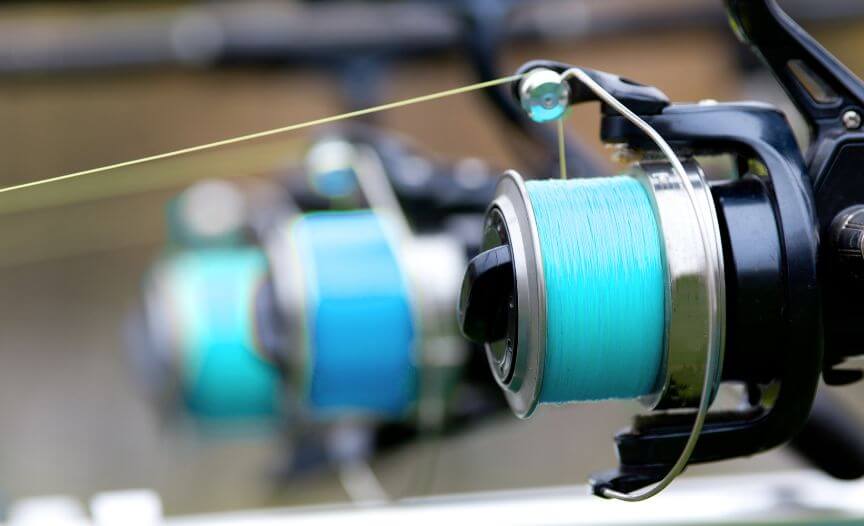
The Arbor Knot
Arbor Knot is perhaps the most common fishing knot used to attach a fishing line to your reel. It is one of the most effective and simplest knots that you can learn as a beginner.
It is a tie based on a noose knot wherein the act of pulling tightens itself. Below is a 6-step process of the arbor knot.
Step-By-Step Guide on Tying Line to Reel using Arbor Knot
- Grab the end of your fishing line and tie an overhand knot.
To do an overhand knot, you should create a loop first and then pass the end through it. Pull the end line to tighten and complete the knot.
This first overhand knot will act as a stopper, securing your arbor knot in place and preventing undoing. - Trim the tag end by cutting off the excess line after the knot.
Tip: You can cut the tag end close to the knot. However, it might be better to leave about a quarter of an inch of the tag end as a precaution in case of slippage from the knot. - Take the end line and wrap it around your reel.
- With the main line, make a loop with the end line and tie a second overhand knot.
Tip: Most beginners get stuck at this step. You’ll know when you’ve done it right when a ring between the main and end lines is present. - Tighten the knot by simultaneously pulling the tag end (the line with the first knot) and the line around the reel.
Tip: It is recommended to moisten your line first before tightening the knots to prevent damaging the line from friction and heat when pulling. - Pull the main line to make the tightened knot slide towards the reel. Continue pulling the main line until the knots (first and second overhead) collide, eventually preventing you from pulling any further.
However, one thing to note about this knot is that: as simple as its steps may be, it has a possibility to slip, as most fishers complain. So, if slipping ever happens to you with this knot, you can try the alternative knot mentioned in the next section.
Here’s a good tutorial from Fishing POV channel showing how to tie the Arbot Knot.
The 2-5 Knot
2-5 knot is an improved Unit knot with just two (2) additional steps that have been popularized recently on YouTube. This knot is believed to have a better capability of holding and resisting slip better than the common arbor knot.
Step-By-Step Guide on Tying Line to Reel using 2-5 Knot
- Grab the end of your fishing line and measure to about 10 inches.
We’ll call this the tag line. This will serve as a segment line to create our Uni knot later. - With your other hand, loop the main line twice around your reel.
- Hold both the main line and the end line with one hand near the end of your reel.
- Tie a Uni Knot using the tag line with your free hand.
To tie a Unit knot, make a loop with the tag line and then pass the end through the loop 5 or 6 times.
Note: If you are still confused, you may refer to the end of this article, where we included a detailed step-by-step process of the Uni knot. - Pull the tag end and the main line (line wrapped around the reel) at the same time to tighten the Uni knot.
Tip: It is advised to moisten the knotted part of the line first before tightening it to prevent weakening and damaging the line from friction when pulling. - Once the Uni Knot is tightened, bring it towards your reel by holding onto the Uni knot with one hand and by pulling the main line with your other hand.
Make sure to have a cross pattern of the two lines wrapped around your reel (from step 2) before setting the knot to tighten on your reel and the main line completely.
Tip: As much as possible, spread the crossing lines wrapped around your reel apart. This can give your line more security and resistance due to the additional hold from the wrapped lines. - Continue to tug and pull the mainline until the knot and fishing line are nicely set and secured around your reel.
- Trim off the rest of the tag line.
Tip: Leave just about a quarter of an inch of the tag line from the knot before trimming off the rest as an additional precaution in case of slippage.
Here’s a good tutorial from Ish With Fish channel showing how to tie the 2-5 Knot.
What is the best knot to tie your reel?
In most cases, it all comes down to how you’ve properly made the knot. The knot’s strength really depends on how tightly you’ve secured your fishing line to your reel. I personally would prefer to use the 2-5 knot as it has more hold. For many beginners, I would suggest trying to do both the arbor knot and 2-5 knot, for both are simple and proven effective. It would be best to select the knot that you are most comfortable with as a beginner.
If you are still struggling with both knots, do not be disheartened. Keep practicing and ask for help from your fellow fishing buddies; they’ll be happy to help you. In time, the steps would be muscle memory to you, and you’ll be able to breeze through the steps without thinking too much about it.
Importance of Knots in Fishing
Aside from knowing fishing gears and types of fishing lines, learning to make a solid knot is vital and will make a huge difference in your fishing experience.
You must be able to tie the kind of knot that will be suitable for your hook, line-to-line connections, and line-to-reel connections.
Being knowledgeable about different types of knots will help you deal with any problems involving attachments with your fishing lines and gears. With enough practice, a reliable knot might help you secure your biggest catch without worrying about unraveling your fishing line.
Additional Must Learn Knot for beginners
Now that you’ve learned how to tie your fishing line to your reel using knots, here’s another helpful knot that is dependable and has a versatile application in many fishing settings.
Uni Knot
The Uni Knot might be one of the most used basic fishing knots that can come in handy at any given situation during your fishing journey.
Its main purpose is to connect the hook with the fishing line and link two fishing lines together. This knot can also be used to tie a fishing line to your reel, although it might be less effective than the previously stated Arbor knot and 2-5 knot in this scenario.
This knot is also suitable for both monofilament and braided lines or whichever type of fishing line you prefer to use.
Step-By-Step Guide on Uni Knot
- Insert about 10 inches of the end line to the eye of the hook.
This will be our tag line. - Hold the lines near the hook with one hand to prevent the tagline from sliding back.
- Create a loop with the tag line. Hold this loop with the same hand in step 2.
- With your free hand, pass the tag line through the loop 5 or 6 times.
Note: Pass the tag line around the two parallel lines created by the mainline and the tag line. - Pull the tag end enough to form the knot, but do not completely tighten it yet.
- Hold on to the hook with one hand and pull the main line with your other hand at the same time until the Uni knot reaches the eye of the hook.
Tip for steps 5 and 6: It is suggested to wet the line from the hook to the knotted portion before tightening to prevent damaging the line from friction when pulling. - Continue to pull the main line and the tag line until the knot and fishing line is set and secured to the hook.8: Trim off the excess from the tag line.
Tip: When trimming the tag end, it might be better to leave around a quarter of an inch of the as a precaution in case of slippage from the knot.
Here’s a good tutorial from Fishthatwontquit channel showing how to tie the Uni Knot.